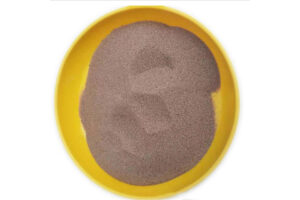
The Ultimate Guide to Making Casting Sand
 Are you interested in creating your own casting sand for your DIY projects? Look no further! In this post, we will guide you through the process of making casting sand step by step. With our easy-to-follow instructions, you’ll be able to create high-quality casting sand that will help you achieve your desired sand casting parts.
Before we dive into the process, let’s first understand what casting sand is and why it’s important. Casting sand is a mixture of sand, clay, and water that is used to create molds for metal casting. It’s essential to have the right type of casting sand to ensure that your molds are strong and durable. Now, let’s get started!
Step 1: Gather Your Materials
To make casting sand, you’ll need the following materials:
– Sand (preferably fine-grained)
– Bentonite clay
– Water
– A mixing bowl
– A spoon or spatula
– A plastic bag or container for storage
Step 2: Mix the Sand and Clay
In a mixing bowl, combine the sand and bentonite clay in a ratio of 5:1 (five parts sand to one part clay). Mix the two materials together thoroughly until they are evenly distributed.
Step 3: Add Water
Slowly add water to the mixture while stirring continuously. The amount of water you need will depend on the type of sand and clay you’re using. You want the mixture to be moist enough to hold its shape when squeezed, but not too wet that it becomes soupy.
Step 4: Knead the Mixture
Once you’ve added enough water, knead the mixture with your hands until it’s well combined. This will help to distribute the moisture evenly throughout the sand and clay mixture.
Step 5: Store the Casting Sand
Once the mixture is well combined, store it in a plastic bag or container. Make sure to seal it tightly to prevent the sand from drying out.
Congratulations! You’ve successfully made your own casting sand. Now, let’s talk about some tips to help you get the most out of your casting sand.
Tip 1: Use Fine-Grained Sand
Using fine-grained sand will help to create a smoother surface on your molds. This will make it easier to remove the finished product from the mold without damaging it.
Tip 2: Use the Right Amount of Water
As mentioned earlier, the amount of water you need will depend on the type of sand and clay you’re using. It’s important to find the right balance between moisture and dryness to ensure that your molds are strong and durable.
Tip 3: Let the Sand Rest
After you’ve mixed the sand and clay together, let it rest for at least 24 hours before using it. This will give the mixture time to settle and become more cohesive.
In conclusion, making casting sand is a simple process that anyone can do. With the right materials and a little bit of patience, you can create high-quality casting sand that will help you achieve your desired results. Remember to use fine-grained sand, the right amount of water, and let the sand rest before using it. Happy casting!


