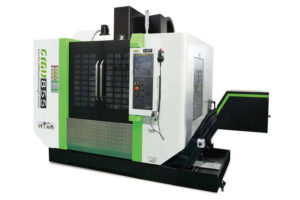
The Ultimate Guide to Building Your Own 5 Axis CNC Machine
 Are you tired of relying on expensive CNC machines for your projects? Do you want to take control of your manufacturing process and build your own 5 axis CNC machine? Look no further! In this post, we will guide you through the process of building your own 5 axis CNC machine from scratch.
Before we dive into the details, let’s first understand what a 5 axis CNC machine is. A 5 axis CNC machine is a computer-controlled machine that can move a tool or a part in five different directions simultaneously. This allows for more complex and precise cuts, making it ideal for manufacturing complex parts and components.
Now, let’s get started with the building process.
Step 1: Designing Your Machine
The first step in building your own 5 axis CNC machine is to design it. You can use CAD software to design your machine, or you can use a pre-designed plan. Make sure to consider the size of your machine, the materials you will use, and the type of cutting you will be doing.
Step 2: Gathering Materials
Once you have your design, it’s time to gather the materials you will need. You will need a variety of materials, including aluminum extrusions, linear rails, ball screws, and stepper motors. You can purchase these materials online or from a local hardware store.
Step 3: Building the Frame
The frame is the foundation of your machine, so it’s important to build it correctly. Start by assembling the aluminum extrusions to create the frame. Make sure to use the correct screws and bolts to secure the frame together.
Step 4: Installing the Linear Rails
Next, install the linear rails onto the frame. These rails will guide the movement of the cutting tool. Make sure to align the rails correctly and secure them to the frame.
Step 5: Adding the Ball Screws
The ball screws will control the movement of the cutting tool. Install the ball screws onto the linear rails and secure them to the frame.
Step 6: Installing the Stepper Motors
The stepper motors will control the movement of the ball screws. Install the stepper motors onto the frame and connect them to the ball screws.
Step 7: Wiring the Electronics
Now that you have the mechanical components of your machine assembled, it’s time to wire the electronics. This includes connecting the stepper motors to the controller board and wiring the power supply.
Step 8: Installing the Controller Board
The controller board is the brain of your machine. Install the controller board onto the frame and connect it to the stepper motors and power supply.
Step 9: Testing Your Machine
Before you start using your machine, it’s important to test it. Make sure all the components are working correctly and that the machine is moving in the correct directions.
Congratulations! You have successfully built your own 5 axis CNC machine. Now, it’s time to start using it for your projects.
In conclusion, building your own 5 axis CNC machine may seem like a daunting task, but with the right tools and guidance, it’s achievable. By following these steps, you can take control of your manufacturing process and create complex and precise parts and components. So, what are you waiting for? Start building your own 5 axis CNC machine today!


