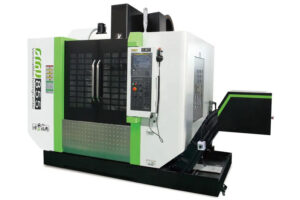
DIY Guide: How to Build Your Own CNC Milling Machine
 Are you tired of spending a fortune on CNC milling machines? Do you want to take control of your manufacturing process and create your own custom parts? If so, building your own CNC milling machine may be the perfect solution for you. In this post, we will guide you through the process of building your own CNC milling machine from scratch.
Step 1: Design Your CNC Milling Machine
The first step in building your own CNC milling machine is to design it. You can use software like AutoCAD or SolidWorks to create a 3D model of your machine. This will help you visualize the final product and identify any potential design flaws.
When designing your CNC milling machine, you will need to consider the following factors:
– Size: How big do you want your machine to be?
– Materials: What materials will you use to build your machine?
– Components: What components will you need to purchase or fabricate?
– Power: What type of motor and power supply will you need?
– Control: What type of control system will you use to operate your machine?
Step 2: Gather Materials and Components
Once you have designed your CNC milling machine, it’s time to gather the materials and components you will need to build it. This may include:
– Aluminum extrusions or steel tubing for the frame
– Linear rails and bearings for the axes
– Stepper motors and drivers for motion control
– Spindle motor and VFD for cutting
– Power supply and wiring
– Control board and software
You can purchase these components online or from local suppliers. Be sure to compare prices and quality before making your purchases.
Step 3: Build the Frame
The frame is the foundation of your CNC milling machine. It needs to be sturdy and stable to ensure accurate cuts. You can use aluminum extrusions or steel tubing to build your frame. Follow your design plans and use a square to ensure everything is aligned properly.
Step 4: Install the Axes
The axes are the moving parts of your CNC milling machine. They need to be precise and smooth to ensure accurate cuts. Install linear rails and bearings on the frame to guide the axes. Use stepper motors and drivers to control the motion of the axes.
Step 5: Install the Spindle Motor and VFD
The spindle motor is the cutting tool of your CNC milling machine. It needs to be powerful and precise to cut through various materials. Install the spindle motor and VFD on the frame. Use a collet chuck to hold the cutting tool.
Step 6: Install the Control System
The control system is the brain of your CNC milling machine. It needs to be reliable and easy to use. Install the control board and software on the frame. Connect the power supply and wiring to the control system.
Step 7: Test and Calibrate Your CNC Milling Machine
Once you have built your CNC milling machine, it’s time to test and calibrate it. Use software like Mach3 or LinuxCNC to control your machine. Test each axis and make sure it moves smoothly and accurately. Calibrate the spindle motor and VFD to ensure it cuts at the right speed and depth.
Conclusion
Building your own CNC milling machine may seem like a daunting task, but it’s actually quite simple if you follow these steps. By designing, gathering materials, building the frame, installing the axes and spindle motor, installing the control system, and testing and calibrating your machine, you can create a custom CNC milling machine that meets your specific needs. So why wait? Start building your own CNC milling machine today and take control of your manufacturing process!


